What Is a Bollinger Bands Strategy? A Trader's Guide to Volatility
In this article
- What Are Bollinger Bands and How Do They Work?
- Two Core Approaches: The Bounce and the Breakout
- The "Walking the Band" Trap and the Reality of Trade Execution
- Understanding the Costs of Trading CFDs
- Combining Bollinger Bands with Other Technical Tools
- Conclusion: Mastering a Bollinger Bands Strategy
- Frequently Asked Questions
- Browse All Education

A Bollinger Bands strategy uses a 20-period simple moving average flanked by two standard deviation lines to measure market volatility. Traders use these dynamic boundaries to identify mean reversion setups in sideways markets or breakout opportunities when contracting bands expand rapidly.
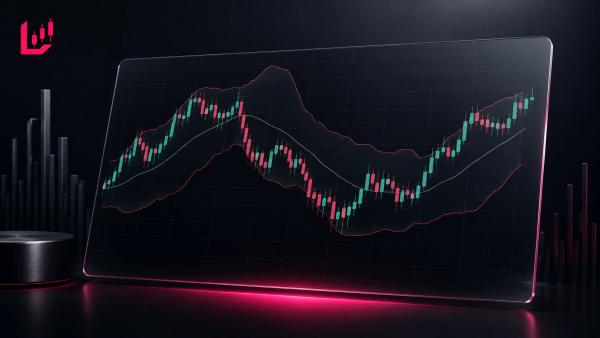
Bollinger Bands are a technical analysis indicator that measures market volatility by plotting two standard deviations above and below a simple moving average. A Bollinger Bands strategy uses these dynamic boundaries to identify potential support and resistance levels, as well as periods of expanding or contracting volatility.
You might assume that once price reaches an outer band, it has to reverse straight away. In reality, prices can continue moving in the same direction for an extended period, leading to significant drawdowns for traders attempting to trade against the trend. Understanding how Bollinger Bands expand and contract helps CFD traders interpret changing market conditions more effectively.
Quick Takeaways
- Bollinger Bands adapt to changes in market volatility using a 20-period simple moving average and two standard deviations.
- Contracting bands, known as a squeeze, often precede periods of increased price volatility.
- A touch of the upper or lower band does not automatically signal a market reversal, as prices can continue to follow the outer band during strong trends.
- High volatility during breakout conditions can increase trading costs through wider bid-ask spreads and execution slippage.
What Are Bollinger Bands and How Do They Work?
Bollinger Bands consist of three lines derived from recent price data:
- Middle Band: A 20-period Simple Moving Average (SMA).
- Upper Band: The middle band plus two standard deviations.
- Lower Band: The middle band minus two standard deviations.
Standard deviation measures how widely prices are dispersed around their average. As market volatility increases, the upper and lower bands widen. When price movements become quieter and the market trades within a narrow range, the bands contract towards the moving average.
Band | Calculation | Behaviour |
|---|---|---|
Upper Band | SMA + 2 Standard Deviations | Widens during periods of increasing upward volatility. |
Middle Band | 20-Period Simple Moving Average | Represents the market's central price trend. |
Lower Band | SMA − 2 Standard Deviations | Widens during periods of increasing downward volatility. |
Because two standard deviations contain approximately 95% of observations in a normal distribution, prices spend much of their time within the upper and lower bands.
Two Core Approaches: The Bounce and the Breakout
Most Bollinger Bands strategies focus on one of two market conditions: range-bound markets or strong directional breakouts.
Mean Reversion (The Bollinger Bounce)
During sideways markets, you'll often see price fluctuate between the upper and lower bands. A mean reversion approach assumes that price touching the lower band may indicate temporarily oversold conditions, while a touch of the upper band may suggest overbought conditions.
Typical scenarios include:
- Potential buy setup: Price reaches the lower band, shows signs of rejection and moves back towards the middle moving average.
- Potential sell setup: Price touches the upper band, loses momentum and moves back towards the middle band.
This approach generally works best when markets are ranging and well-defined support and resistance levels remain intact.
Breakout Trading (The Bollinger Squeeze)
When you see market volatility fall to unusually low levels, the upper and lower bands narrow around the 20-period moving average. This pattern is known as a Bollinger Band squeeze.
A squeeze indicates that market volatility has contracted and that a larger price movement may follow. Once price breaks decisively out of the compressed range, the bands begin expanding again. Some traders attempt to capture this momentum as prices break beyond the outer bands.
The "Walking the Band" Trap and the Reality of Trade Execution
One of the most common mistakes you can make as a newer trader is assuming that every touch of an outer band signals an immediate reversal.
During a strong trend, price can continue to move along the upper or lower band for an extended period. This behaviour is often referred to as walking the band. Traders who repeatedly attempt to fade these moves by opening counter-trend positions can accumulate substantial losses if the trend continues.
Market Condition | Common Assumption | What Often Happens |
|---|---|---|
Strong Uptrend | Sell whenever price reaches the upper band. | Strong momentum keeps price tracking the upper band as volatility expands. |
Strong Downtrend | Buy whenever price reaches the lower band. | Selling pressure keeps price close to the lower band instead of returning to the moving average. |
Understanding the Costs of Trading CFDs
When you trade breakout strategies using leveraged CFDs, you should always weigh execution costs alongside the trading setup itself.
Key costs include:
- Slippage: Sharp increases in volatility may cause market orders to be executed at less favourable prices than expected.
- Spread Widening: Bid-ask spreads often widen during volatile breakout conditions, increasing the cost of entering and exiting positions.
- Overnight Financing Charges: Holding positions overnight may result in financing costs that reduce overall returns.
Because leverage increases both potential gains and potential losses, regulators such as the FCA impose limits on the amount of leverage available to retail traders.
Retail CFD trading carries a significant level of risk — the FCA reports that around 74-89% of retail accounts lose money trading these products.
Risk management, including appropriate stop-loss placement and position sizing, remains essential regardless of the trading strategy used.
Combining Bollinger Bands with Other Technical Tools
If you use Bollinger Bands in isolation, you can end up with false signals — particularly during strong trending markets or periods of low liquidity. Combining them with other forms of technical analysis can provide additional market context.
In practice, many traders find that combining Bollinger Bands with structural confluence tools helps them avoid entering trades immediately before significant support or resistance levels give way.
For example, combining Fibonacci retracement levels with Bollinger Bands allows traders to assess whether an outer band coincides with an important retracement level. If price reaches the lower band while also testing the 61.8% Fibonacci retracement, the combined evidence may provide stronger technical context than either signal alone.
Conclusion: Mastering a Bollinger Bands Strategy
For traders who want a rules-based bollinger bands trading strategy, combining the squeeze setup with a secondary confirmation tool is often the safest starting point.
A Bollinger Bands strategy provides a practical way to assess changing market volatility. By recognising the difference between range-bound mean reversion setups and trend-following breakout opportunities, you can interpret price movements with greater discipline.
However, Bollinger Bands measure historical price volatility rather than predict future market direction. They are most effective when combined with other forms of technical analysis and robust risk management.
To build a broader understanding of market analysis, explore our guide to technical indicators and learn how trend, momentum and volatility tools complement one another.
This article is for educational purposes only and does not constitute financial advice. Trading CFDs and other leveraged products involves significant risk, and losses can occur quickly when using leverage. Always understand the risks and test any trading strategy thoroughly before applying it in live market conditions.
FAQ
What is the main indicator used in a Bollinger Bands strategy?
A Bollinger Bands strategy relies primarily on a 20-period simple moving average (SMA) as its centre line, flanked by upper and lower bands set two standard deviations away. This structure adapts dynamically to market volatility, expanding during sharp price moves and contracting during quiet consolidation periods.
Is touching an upper Bollinger Band an automatic sell signal?
No, touching an upper band is not an automatic sell signal. In strong trending markets, price can hug or "walk" the outer band for an extended period. Expecting an immediate reversal without secondary technical confirmation often leads to severe losses during powerful breakout trends.
What does a Bollinger Band squeeze mean for CFD traders?
A Bollinger Band squeeze occurs when the upper and lower bands contract tightly around the moving average, signalling historically low market volatility. For CFD traders, a squeeze indicates that market energy is building, often preceding a sharp breakout and subsequent expansion in price volatility.
What tools combine best with a Bollinger Bands strategy?
Traders often combine Bollinger Bands with momentum oscillators like the Relative Strength Index (RSI) or structural tools like Fibonacci retracements. Pairing dynamic volatility bands with horizontal support or retracement levels helps filter out false breakout signals and confirms trade confluence.
How do trading costs impact breakout setups using Bollinger Bands?
Trading sudden Bollinger Band breakouts often coincides with rapid volatility expansion, which can lead to wider bid-ask spreads and execution slippage. Additionally, holding breakout swing positions overnight incurs financing charges, which reduces net trade profitability on leveraged CFD accounts.